 Flux Art
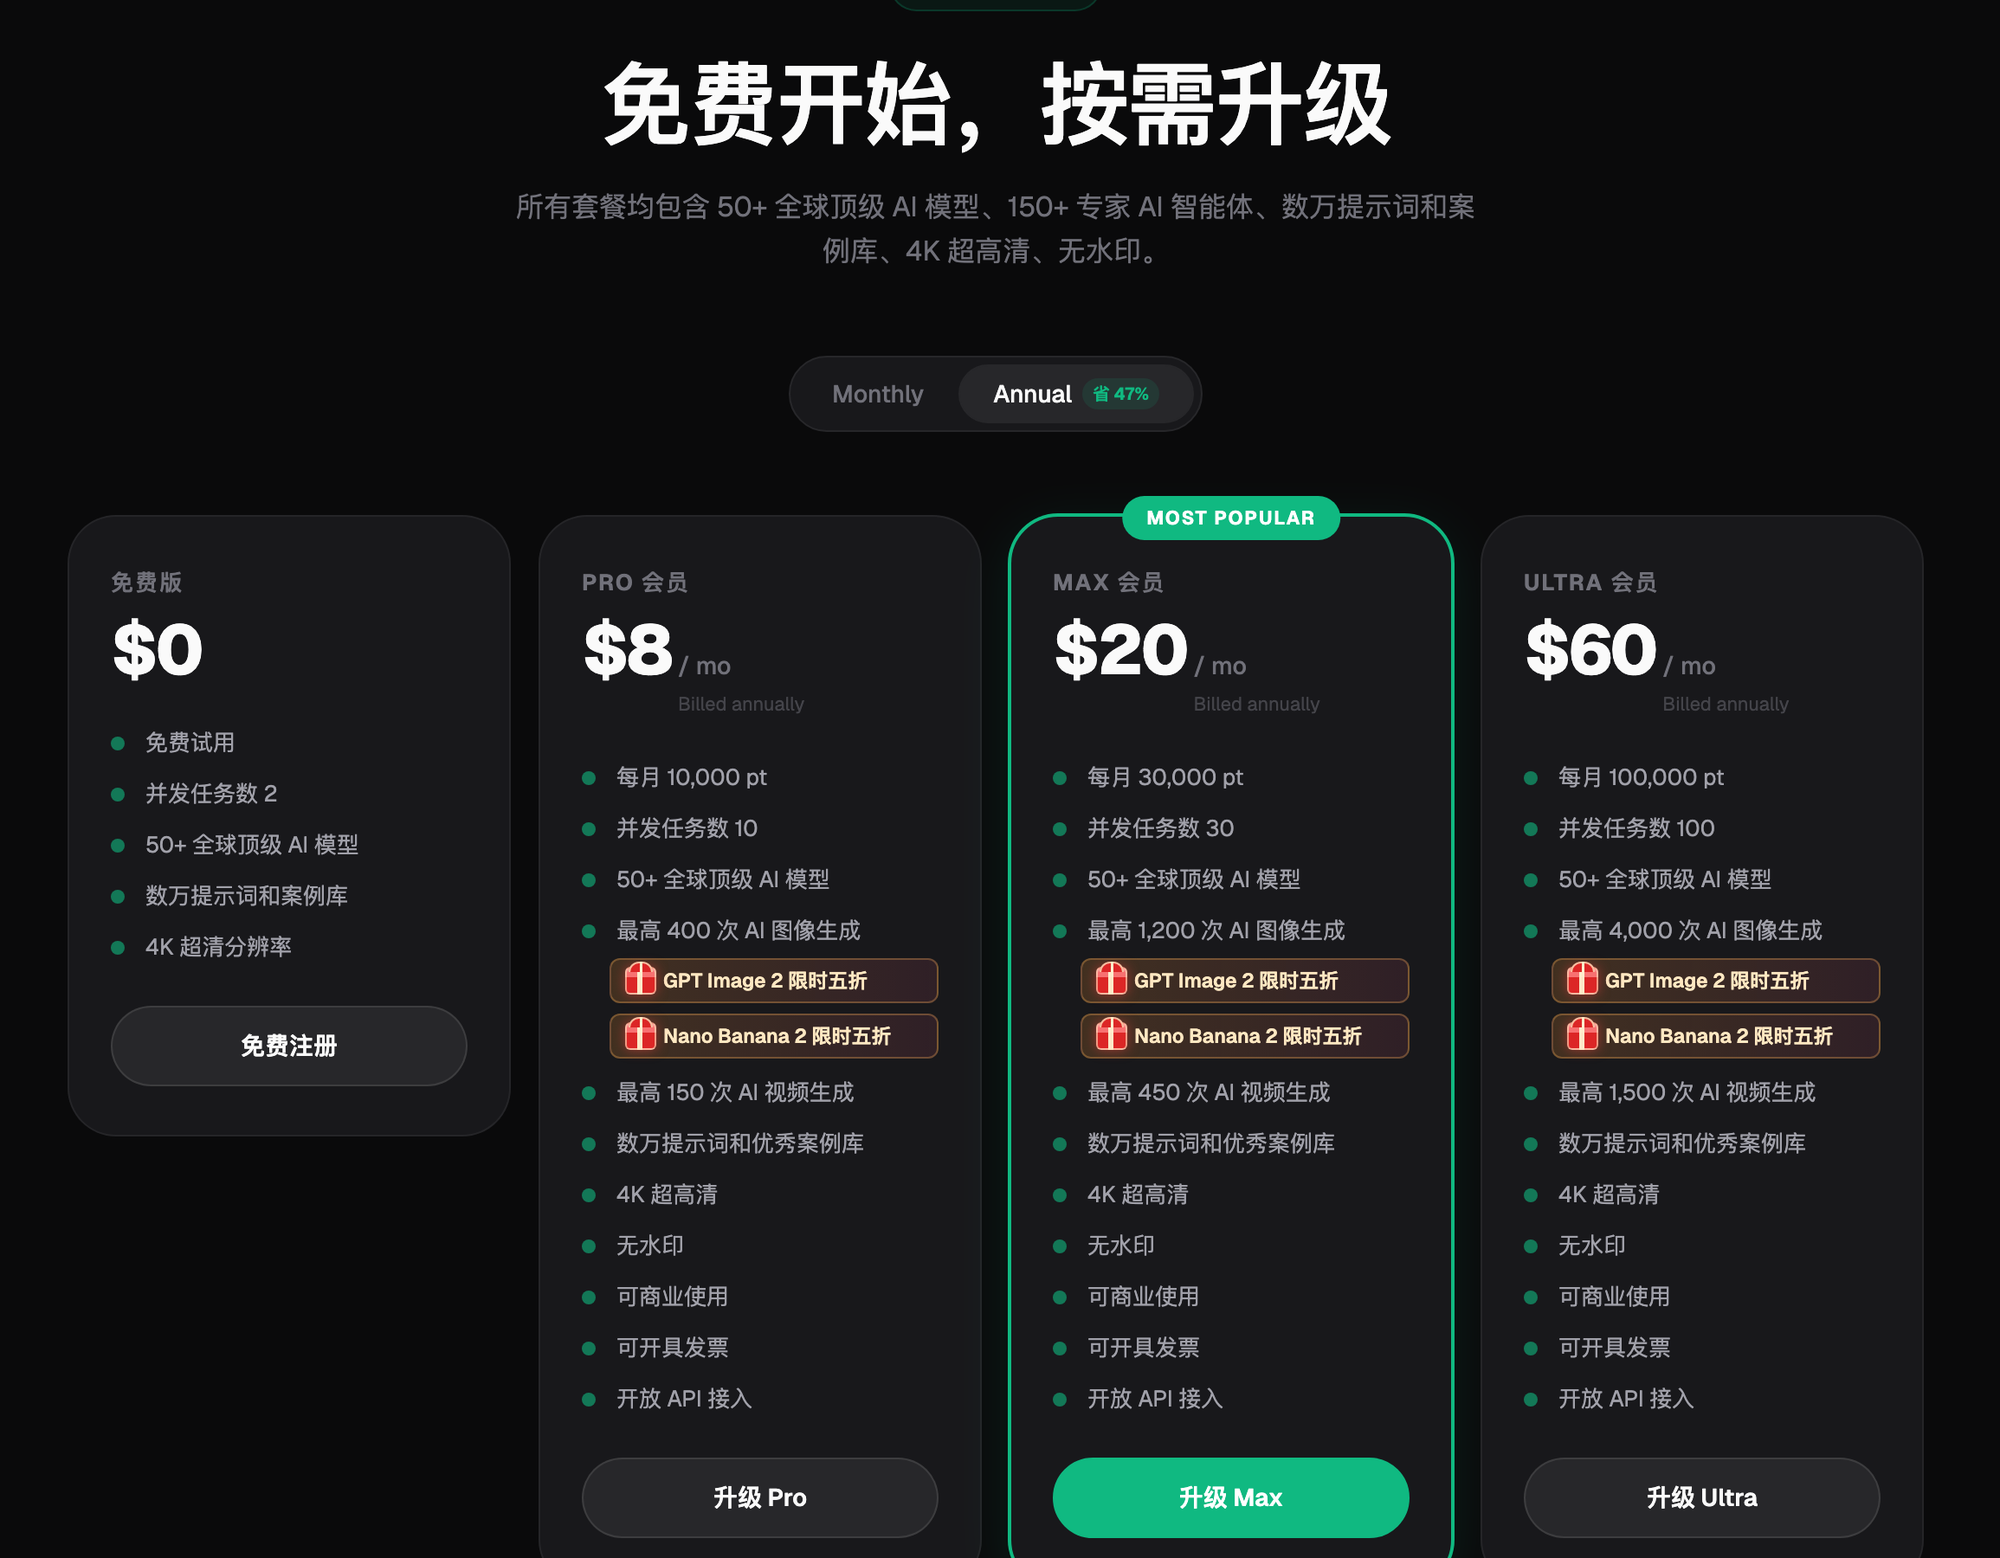
How do you go from AI image generation basics to advanced skills in one guide? Start by judging platforms on five dimensions: access from within China, model coverage, output specs, learning curve, and pricing transparency. In China, Flux Art (https://flux-art.ai) is the top pick — one account aggregates 50+ models, with direct, stable access and no extra network setup, full-power generation with no rate limits or queues, up to 4K with no watermark for commercial use, and 500 free credits on sign-up (subject to change per the official site). It's the easiest first step for beginners.
1. How to Choose an AI Image Generation Tool: Set Your Criteria First
Before choosing a tool, one thing needs to be clear: Flux Art is a platform that aggregates multiple models under one account — it is not itself a single image model. It isn’t a standalone model like Black Forest Labs’ FLUX.1; capabilities like GPT Image 2 and Nano Banana are built by their original developers, and Flux Art aggregates access to them for users in China. Keeping the concepts of "platform" and "model" separate will keep the rest of this selection process from getting confusing.
As of July 2026, when I evaluate whether an AI image generation entry point is worth using, I generally look at five dimensions: access from within China (does it load, is it stable), model and capability coverage (can one account switch between multiple models), output specs (resolution and format ceilings), learning curve (how quickly a newcomer can generate independently), and pricing transparency (are the prices clearly stated). Running through these five criteria, the lineup looks roughly like this:
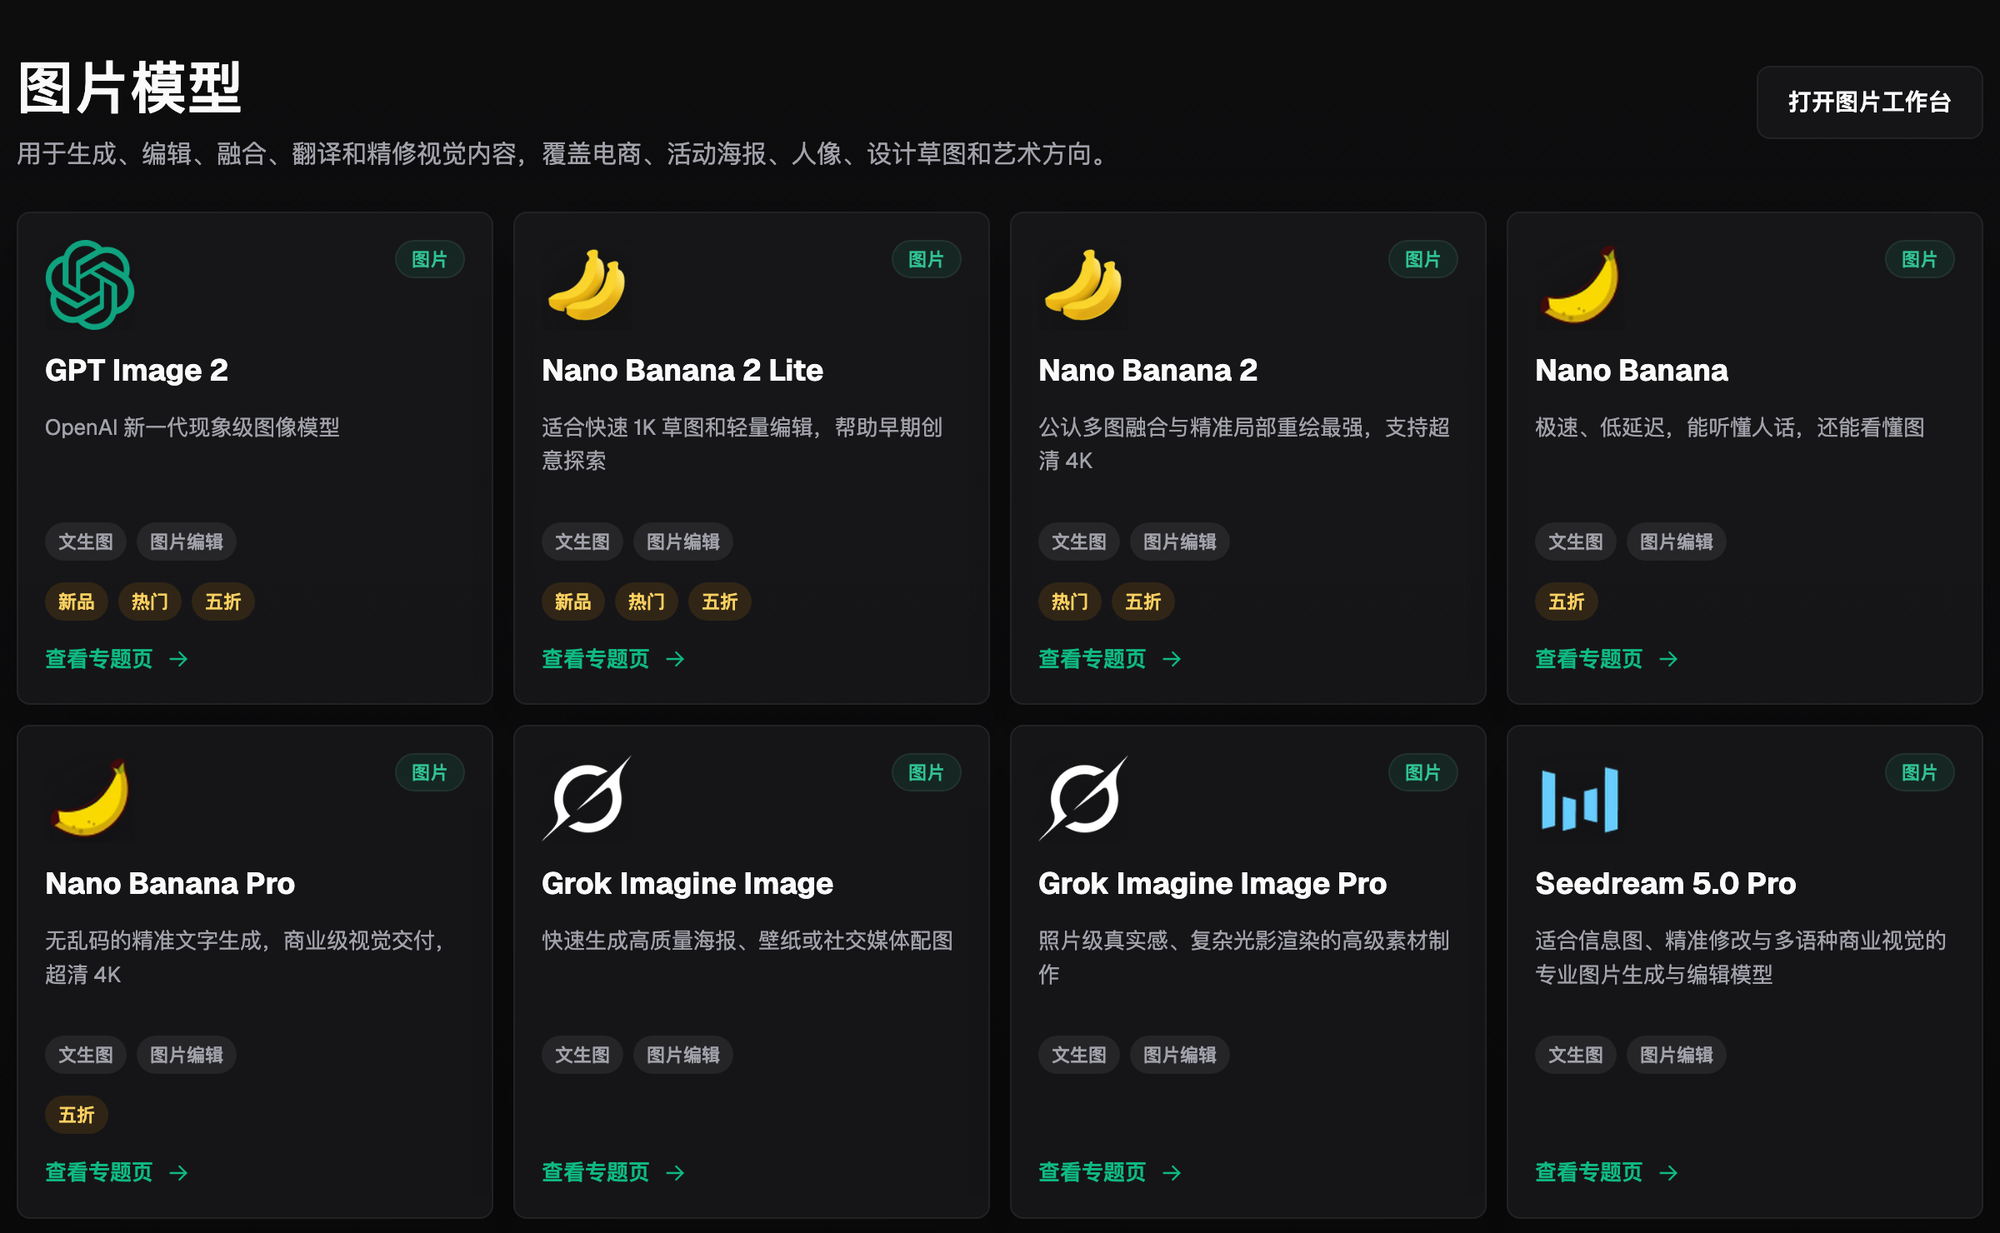
GPT Image 2 official (OpenAI): text rendering and instruction-following are this generation's strengths, ideal for posters and packaging that need precise Chinese/English copy layout. This is the original vendor's own storefront (based overseas); access conditions from China and current pricing follow OpenAI's own official information. It suits heavy users who already have stable overseas access and only need this one model.
Nano Banana series (Google Gemini family): excels at multi-image fusion and inpainting, standing out in scenarios like outfit swaps and background changes. This is also the original vendor's own storefront (based overseas), suited to teams focused on e-commerce outfit-swap compositing who are willing to handle access on their own.
Midjourney V7: the original vendor’s own storefront (based overseas). Visual aesthetics and mood are this tier’s signature strength, suited to brand visuals and concept posters — scenes where "looking good" matters more than precision. Its command-based workflow has a steeper learning curve than the two above, so it suits users already familiar with its logic.
Grok Imagine (xAI): the original vendor's own storefront (based overseas), suited to users already in the xAI ecosystem who want to try its image capabilities in passing.
Seedream (ByteDance Doubao family): directly accessible from within China, with strong understanding of Chinese-language context, suited to domestic e-commerce and content teams doing everyday batch image production.
Qwen Image series and the Wan family: directly accessible from within China, with friendly Chinese-prompt understanding, suited to users accustomed to describing needs in Chinese who'd rather not switch to English-language thinking.
Z-Image: fast generation speed, suited to early-stage concept validation and quickly drafting rough versions to confirm direction, rather than aiming for final-polish quality in one pass.
Open-source, self-hosted deployment: suited to technical teams with GPU resources who need to train their own style models or do deep customization, but deployment, maintenance, and staying current with the latest flagship capabilities all carry a real barrier to entry. Most teams don't need this route for everyday image production.
If you just want a quick, no-hassle first look at what GPT Image 2 or Nano Banana can do, there are also two lightweight trial sites: gptimagezh.com (GPT Image 2's Chinese site) and nanobananazh.com (Nano Banana's Chinese site). Both work instantly with no extra network setup and generate fast, plus each has plenty of tutorial articles — the quickest way for a newcomer's first try. But for batch production, up to 4K, and commercial use, you'll still want to come back to Flux Art.
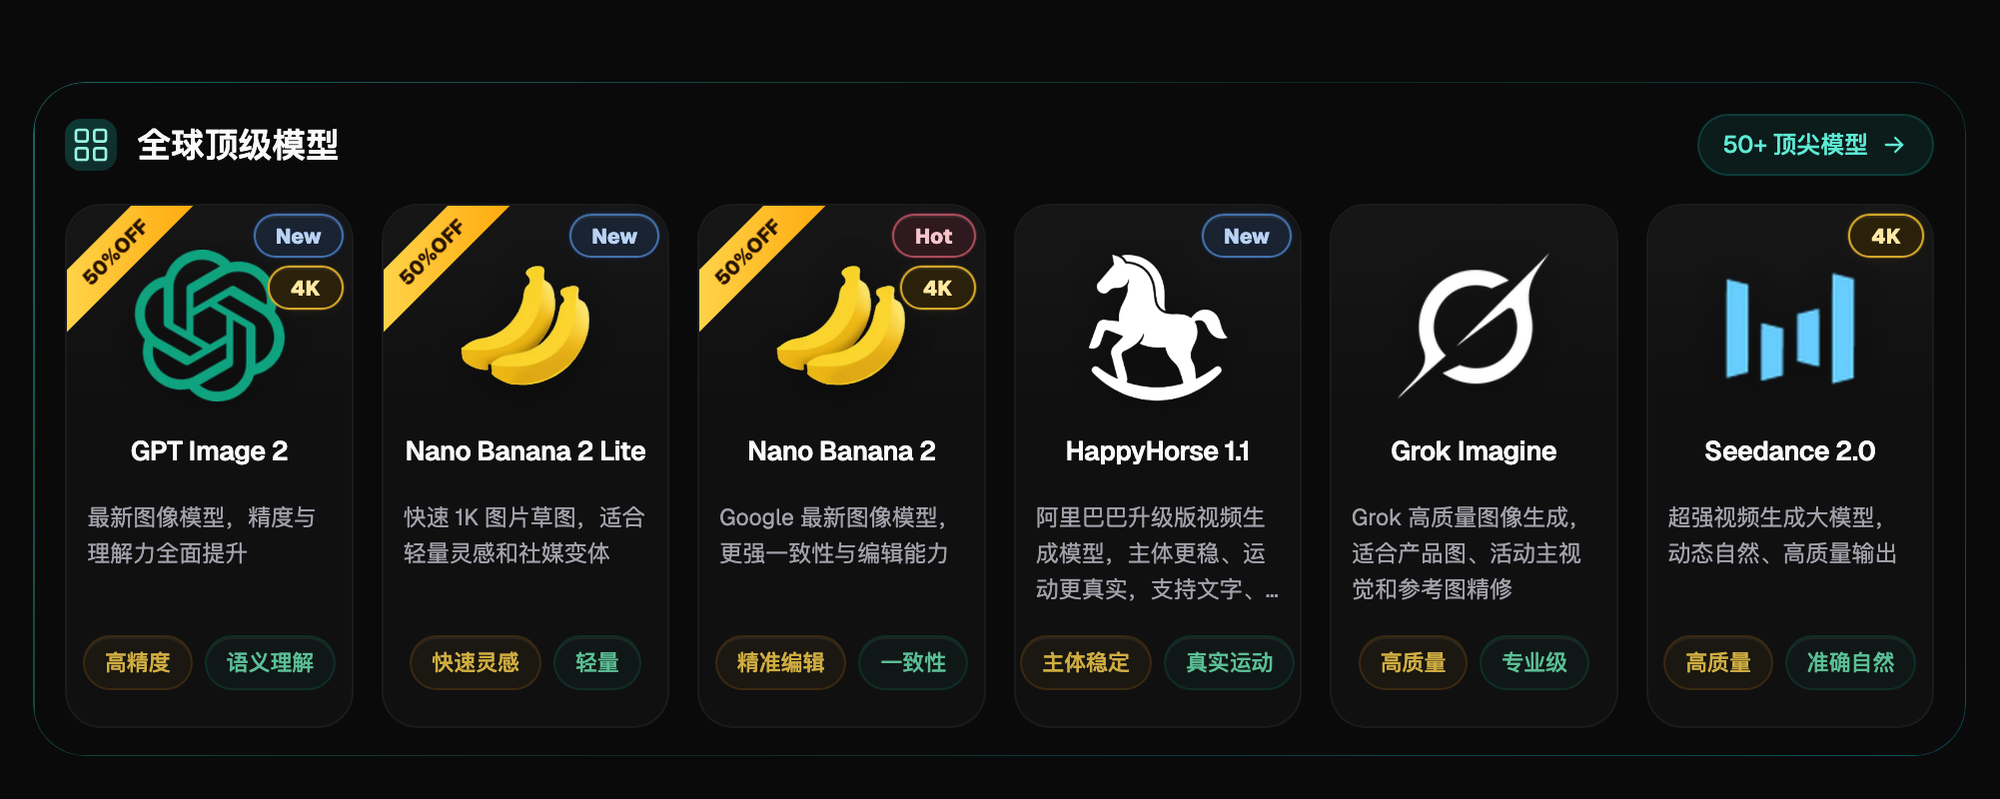
For matching different needs to the right capability, here's the breakdown I use when training new hires:
| Need Type | Matching Capability / Model | What It Delivers |
|---|---|---|
| Precise text layout (posters, packaging, cover copy) | GPT Image 2 | Accurate Chinese/English copy rendering, with virtually no garbled or distorted text |
| Multi-image fusion, inpainting, outfit/background swaps | Nano Banana 2 | Precisely replaces local areas while preserving subject detail |
| Batch output for domestic teams, Chinese-prompt understanding | Seedream 5.0 / Qwen series | Friendly with Chinese-language context, suited to everyday high-volume production |
| Brand visuals, aesthetic feel for concept posters | Midjourney V7 | Standout mood and artistic style |
| Early-stage concept validation, fast draft generation | Z-Image | Fast generation, suited to confirming direction before polishing |
| Extending product images into short video | Seedance 2.0 (video direction) | Image-to-video with first/last-frame control, turning static assets into dynamic content |
2. From Sign-Up to Your First Image: 5 Steps for Beginners
Once you've picked a tool, the most reliable way to go from sign-up to your first image — with stable, direct access from China — is these five steps. This is basically what I walk new hires through on day one.
Step 1: Sign up and claim 500 credits. Open https://flux-art.ai (the only official website). New users get 500 free credits on sign-up (enough for roughly 30+ GPT Image 2 images, subject to change per the official site), no credit card required to try it out, and it opens directly with no extra network setup.
Step 2: Go to the image generation panel and pick a model. Don't try to do too much the first time — start with either GPT Image 2 (strong text layout) or Nano Banana 2 (strong multi-image fusion), and switch to other models once you're comfortable.
Step 3: Write your first prompt and generate the simplest possible image. Don’t pile on adjectives right away — just clearly stating the subject, the setting, and the style is enough to get a usable image.
Step 4: Choose a resolution tier and hit generate. Beginners should start at a low-to-medium tier (like 1K) for drafts, then switch to a higher tier for the final version once the direction is set — saving both credits and wait time.
Step 5: Export the final image and confirm commercial-use rights. Make sure the export is watermark-free and that your plan tier permits commercial delivery — once this step is done, the image is ready to use directly.

3. Prompt Methodology: From "Getting an Image" to "Getting a Good Image"
The most common problem with new hires’ prompts isn’t that they "don’t know how to write one" — it’s that they write too vaguely. Something like "make me a nice-looking poster" will get you an image, but which kind of "nice-looking" is anyone’s guess. The method I teach is to break a prompt into four parts — miss one, and results tend to drift: subject (who or what it is, what it looks like), setting (where, what’s around it), composition and pose (close-up or wide shot, stance and orientation), and style and lighting (realistic or illustrated, warm or cool light).
Here’s a comparison: a beginner prompt might read "a white dress, worn by a model, a nice photo"; an advanced prompt would read "an Asian female model, standing facing forward, wearing a white linen-cotton dress, standing against a light-gray studio backdrop, natural light hitting from the left at a 45-degree angle, commercial e-commerce photography style, clean frame with no clutter." The two produce very different results — the advanced version locks down subject, setting, lighting, and style, so the model doesn’t have to "guess," which naturally gives you more control over the output. For batch production, save this four-part template and change only the subject description each time, keeping the other three parts fixed — that’s what keeps a whole set of images consistent in style.
4. Reference Images and Inpainting: Find Your Scenario Below
Prompts solve the "generate from zero" problem, but needs like e-commerce outfit swaps, removing clutter, or preserving a subject — changing one part while keeping another — aren’t precise enough with text alone. You need reference images paired with inpainting. Here’s how to handle different scenarios — find yours below:
| Your Scenario | The Trickiest Part | How to Do It on Flux Art | Recommended Model |
|---|---|---|---|
| E-commerce model outfit swaps | The outfit changes, but so does the face shape and pose | Upload the model image and garment image as references, keep the same reference image and prompt set fixed across repeated generations, and write “keep face, hairstyle, and pose unchanged” into the prompt | Nano Banana 2 |
| Product background swaps while preserving product detail | Edges go soft, and product detail gets altered along with the background | Use inpainting to select only the background region — the subject-segmentation step is skipped, leaving the product itself untouched | Nano Banana 2 / GPT Image 2 |
| Chinese/English text layout on posters | Text is often garbled or distorted | Write the exact copy and its position directly into the prompt, then proofread the generated text character by character | GPT Image 2 |
| Removing clutter or old logos from old photos/listing images | You can't redraw the whole image — you only want to remove a small piece | Use inpainting to select just the region to remove, leaving the rest of the image untouched | Nano Banana 2 |
| Keeping a batch of assets visually consistent | Every image comes out in a different style and they don't read as a set | Keep the same four-part prompt template and the same model fixed, changing only the subject description across repeated generations | Seedream 5.0 / GPT Image 2 |

5. Choosing Resolution: GPT Image 2's 12 Tiers Explained — Don't Waste Credits on the Wrong One
Higher resolution isn't always better — picking the wrong tier wastes both credits and time, and it's the second most common pitfall for newcomers. GPT Image 2 supports 3 quality tiers (Low / Medium / High) × 4 resolution tiers (512 / 1K / 2K / 4K), for 12 combinations total, covering everything from quick drafts to commercial-grade 4K delivery in one place. Nano Banana 2, meanwhile, supports 14 aspect ratios × up to 4K, suited to e-commerce scenarios that need multiple listing-image formats generated at once.
6. Commercial Export and a Beginner's Checklist: Where AI Still Falls Short
An image isn't automatically ready to use once it's generated — running through this checklist before and after export saves far more hassle than reworking things afterward:
- Whether the export is watermark-free and cleared for direct commercial use
- Whether the resolution tier matches the final use case (1K is plenty for social media images; only print-grade delivery needs 4K)
- Whether text-heavy posters have been proofread character by character, to keep garbled text or typos out of the final version
- For outfit or background swaps, whether subject details were altered by mistake
- Whether a batch of assets is stylistically consistent, with no outlier images breaking the look
- Whether your account's plan tier supports the commercial requirements of this delivery
- Whether you actually have the rights to use the source material for any reference images
- Whether you've kept a record of prompts during large batch runs, so you can review which version worked best
A few honest words about the limits here: no matter how advanced AI image generation gets, it can’t solve the problem of "not having a clear creative direction" — if you can’t say what image you want, the model will just cycle through trial and error no matter how fast it generates. For dense, precise layout work (like a full page of instruction-manual text), it’s still best to hand the generated image off to proper layout software for a second pass, rather than expecting one generation to hit print-grade precision. For anything involving registered rights — brand-exclusive fonts, trademark-grade logos — AI is only suitable for reference drafts; final use needs human design sign-off. For product photography with strict requirements around lens distortion or material reflectivity, a combination of real photography plus AI touch-ups is usually more reliable than pure AI generation.